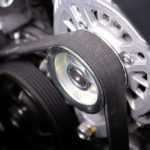
The drive belt in your vehicle is guided by the idler pulley. The idler pulley ensures adequate tension remains while the belt moves as necessary when the vehicle reaches high rates of speed. If the idler pulley no longer functions as it should and you continue to drive, it is almost certain there will be damage to the belt. Thankfully, it is possible for DIYers to replace the idler pulley with the proper tools and guidance.
Keys to Success
If you decide to replace your vehicle’s idler pulley on your own, be sure to park your vehicle on a flat surface. The engine should be off and completely cold before you attempt to replace the idler pulley. Be sure to take a look at your vehicle’s handbook for information pertaining to your specific vehicle make and model.
Gather the necessary tools prior to performing idler pulley replacement. You will need another idler pulley to replace the old one as well as a torque wrench and a socket set.
Be Mindful of Idler Pulley Replacements
The proper replacement idler pulley must be identified before removing the old one. Be sure you have the right one before moving forward. There are some helpful online vehicle lookup tools where vehicle owners can find idler pulleys, dampers, tensioners, and other items suitable for specific vehicles.
Replacing the Idler Pulley
No two vehicles are exactly the same, so the steps detailed below might not be completely applicable to your vehicle. However, this general guide will put you on the right path, facilitating timely idler pulley replacement.
The first step is to remove the negative battery cable. Then, use your socket wrench to loosen the bolt that adjusts the tension. If the idler pulley connects to the alternator, the full alternator must be disconnected to decrease belt tension. However, if the pulley is connected directly to the engine block, the bolt connecting the engine block must be loosened.
The next step is to move the pulley back in order to release the belt. Furthermore, if you spot a protective case around the drive belt, remove that as well.
Address the Retaining Bolt
The next step is to remove the retaining bolt. Once the retaining bolt is removed, you will be able to release the old idler pulley. Hold onto the pulley so it does not spin and use a socket wrench to loosen the center bolt.
Installing the New Idler Pulley
Compare the used idler pulley to the new one to ensure you have an adequate replacement. Once you are sure the new idler pulley is correct, it is time to add it to the vehicle. Be sure to tighten up the retaining bolt when the new idler pulley is in position.
Torque the Pulley
Use your torque wrench in order to torque the new idler pulley to the specific measurement detailed in your vehicle’s owner’s manual. A socket will also help stop the pulley from spinning. Finally, be sure to replace screws, bolts, and protective casings removed in order to replace the old pulley. Do not forget to reconnect the battery!


